How to log in to the Ultra Tool Kit using Anchor Wallet
Ultra Tool Kit is a decentralized application facilitating seamless interaction with the Ultra blockchain and its smart contracts. Designed for developers, it provides essential functionalities such as interacting with Ultra smart contracts, searching for Uniqs, Uniq Factories and Users.
This tutorial will cover the simplest process of logging in to the Ultra Tool Kit using Anchor Wallet. Anchor is a security and privacy focused open-source digital wallet for all Antelope-based networks.
Prerequisites
- You must have created your Ultra Pro Wallet. If you need help creating your Ultra Pro Wallet, please refer to How to create an Ultra Pro Wallet using Ultra Wallet Extension tutorial.
Goal
The goal of this tutorial is to login into the Ultra Tool Kit using Anchor Wallet.
Setting Up Anchor Wallet
Download Anchor (https://www.greymass.com/anchor#download) and follow the installation instructions.
Once installed, open Anchor Wallet and click on the
Setup an Accountbutton.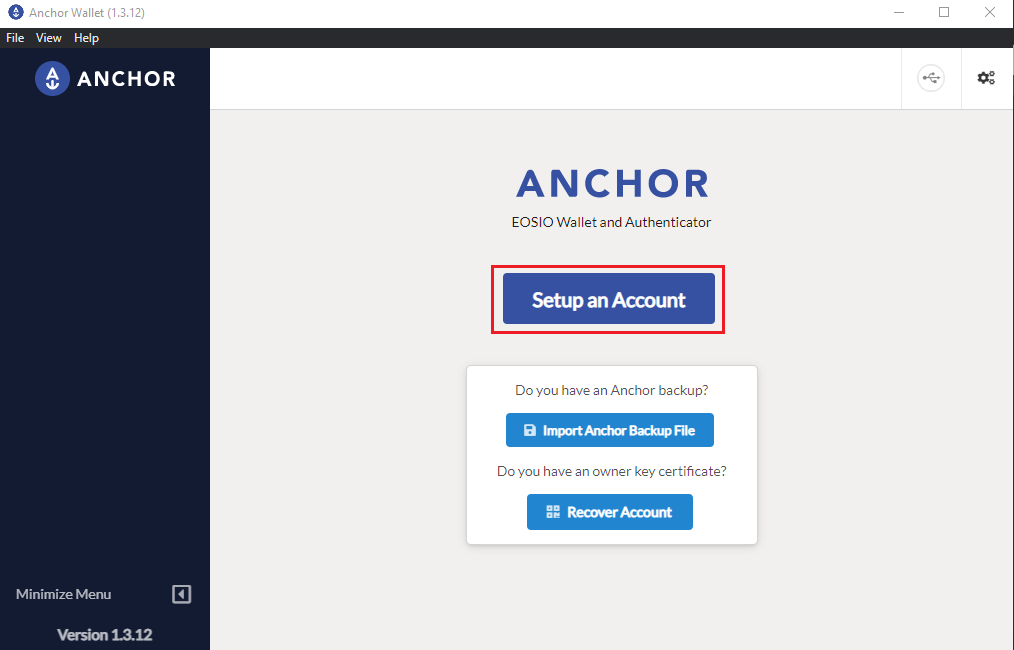
Enter a password for the Anchor Wallet, and click on
Set Passwordbutton. Remember this password as this will be used every time you sign a transaction through Anchor.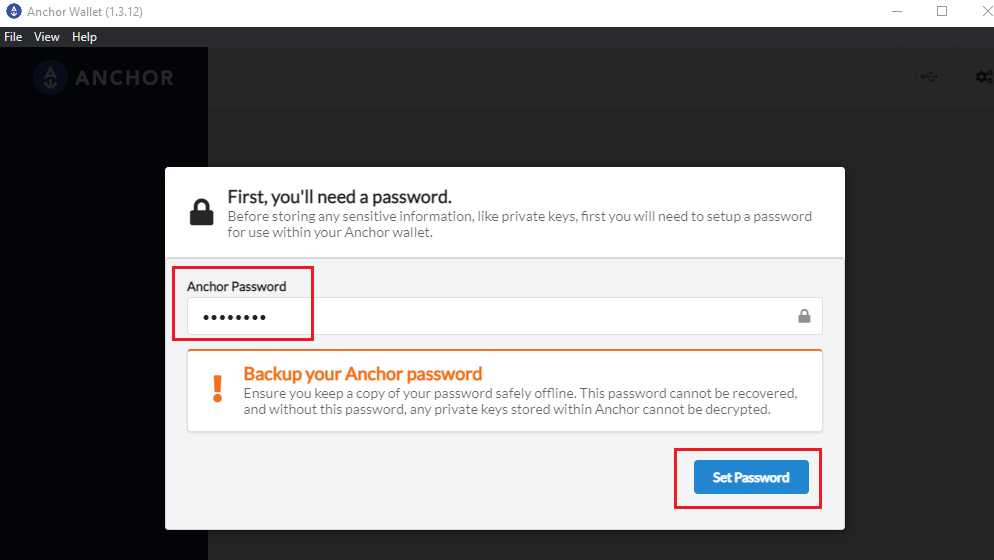
Re-enter the password in the password confirmation screen and click
Set Passwordagain.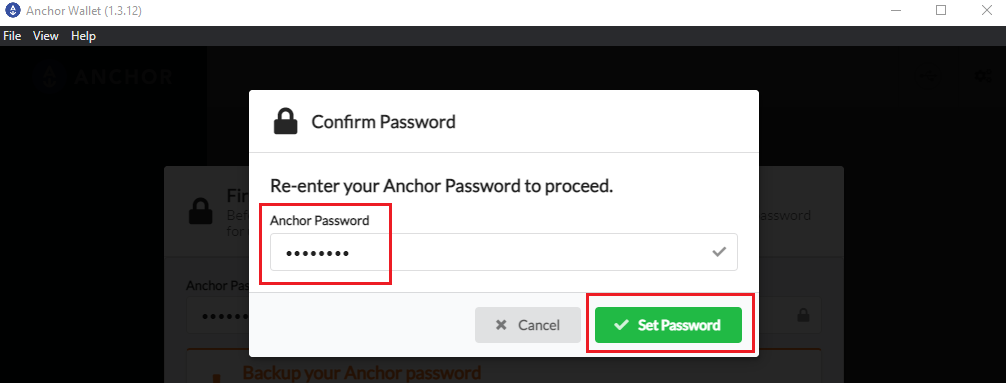
You will now see a list of different blockchains. From the list, click on
EOS.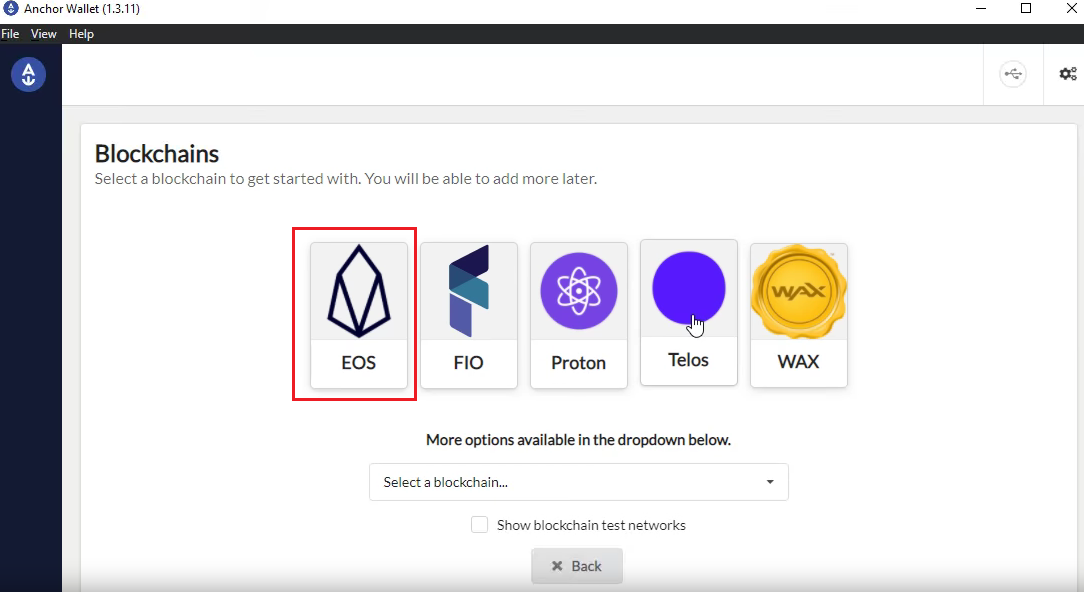
Click on the top left EOS icon and then click on
Manage Blockchains.
On the manage blockchains page, click on
Add/Remove.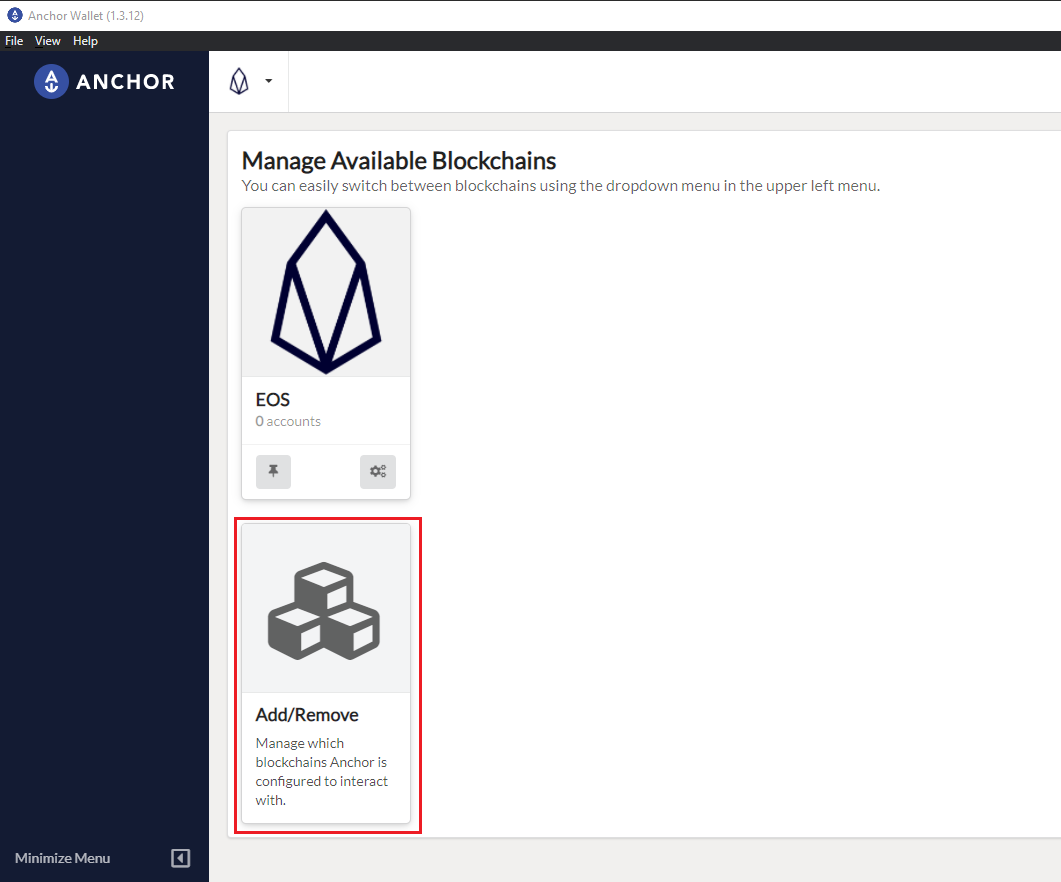
You will see a list of available blockchain networks, from the list find
EOSand uncheck the checkbox next to it, and then click on the+ Custom Blockchainbutton on the top right.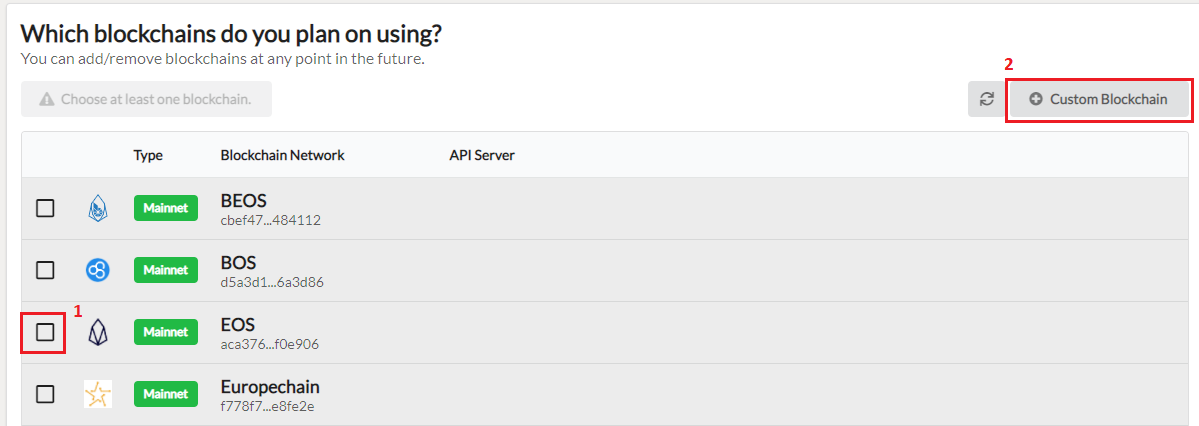
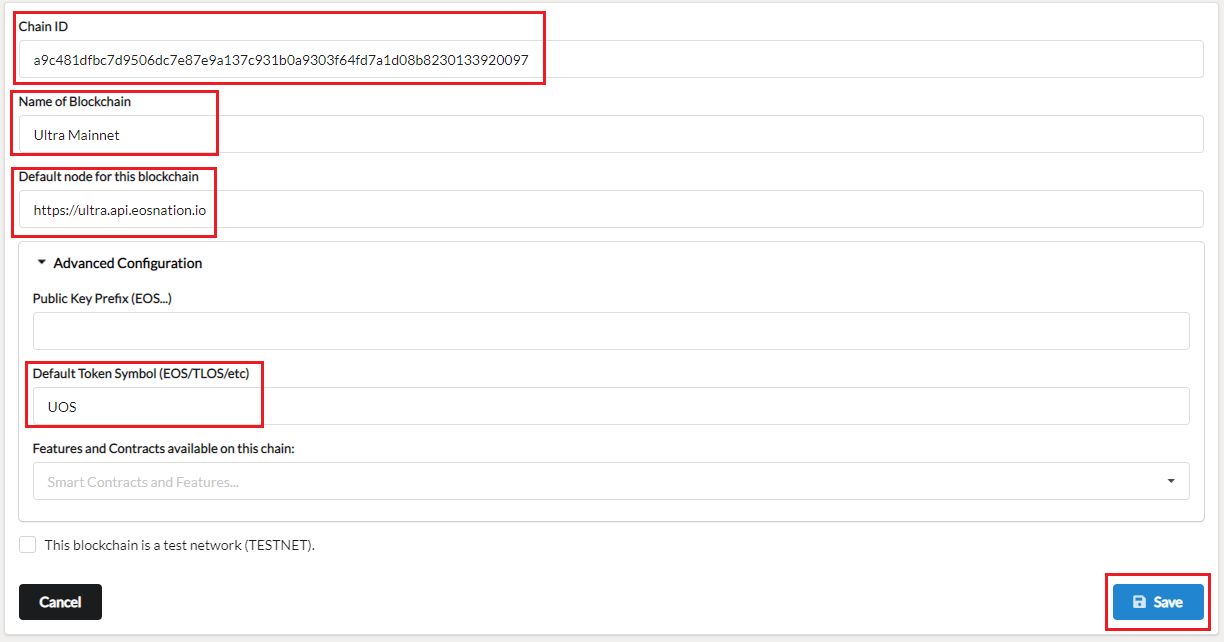
You will be prompted to add a new chain. Use the following details:
- For Mainnet:
- Chain ID:
a9c481dfbc7d9506dc7e87e9a137c931b0a9303f64fd7a1d08b8230133920097 - Name of Blockchain:
Ultra Mainnet - Default Node:
https://ultra.api.eosnation.io - Default Token Symbol:
UOS
- Chain ID:
 For the sake of this tutorial, we are using
 Mainnetnetwork, but you can follow the same steps to add UltraTestnetnetwork too.- For Testnet:
- Chain ID:
7fc56be645bb76ab9d747b53089f132dcb7681db06f0852cfa03eaf6f7ac80e9 - Name of Blockchain:
Ultra Testnet - Default Node:
https://ultratest.api.eosnation.io - Default Token Symbol:
UOS
- Chain ID:
Click on the
Savebutton to proceed.- For Mainnet:
You will now see
Ultra Mainnetadded to the list of available blockchain networks. Check the checkbox next toUltra Mainnetand click on theEnable 1 blockchainsbutton.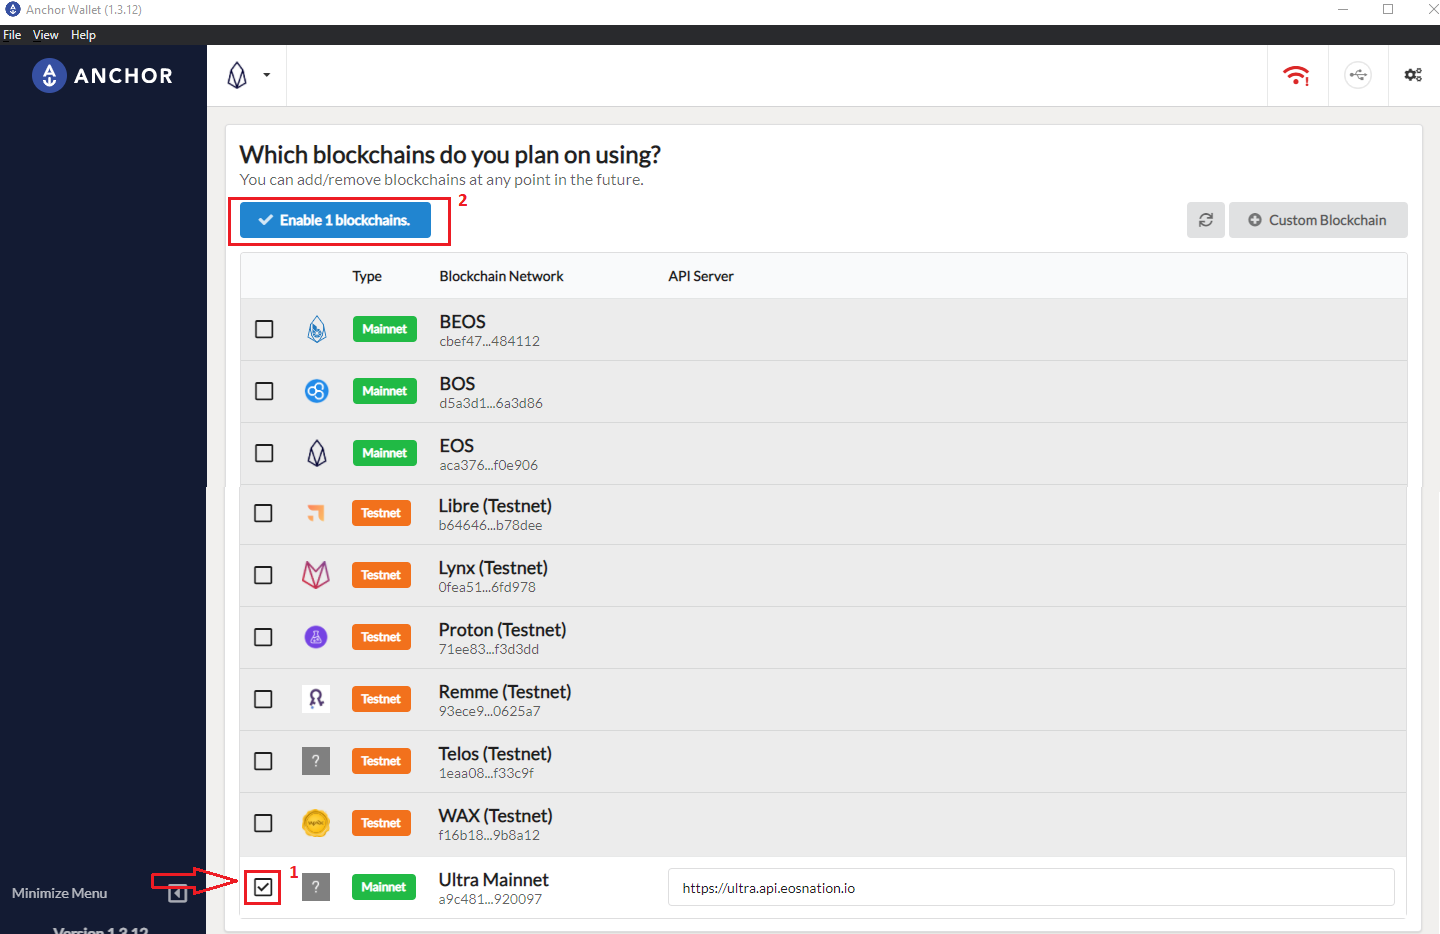
After enabling
Ultra Mainnet, you'll be redirected toManage Available Blockchainspage. From this page, selectUltra Mainnet.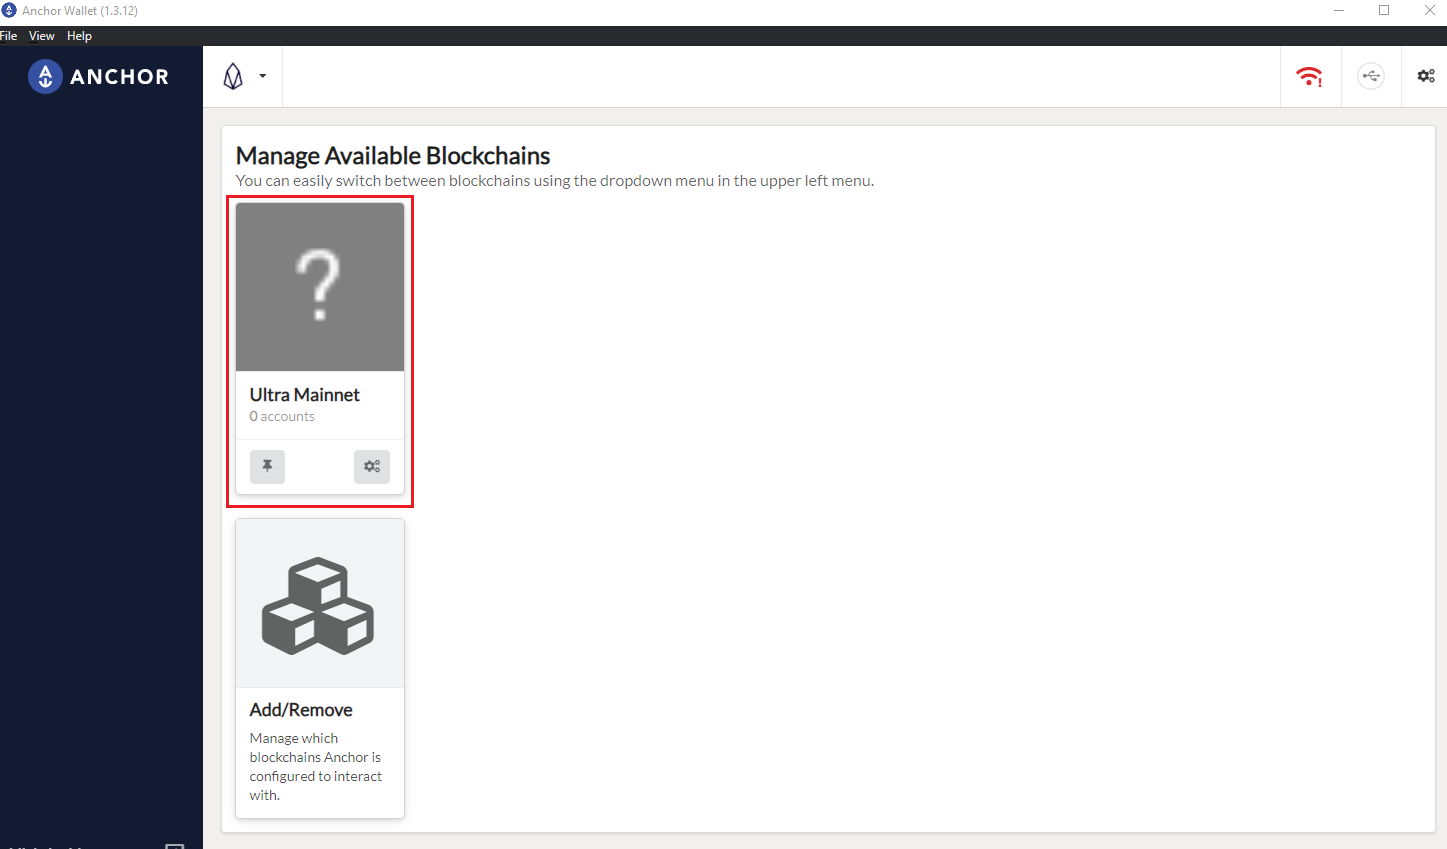
You will now see the
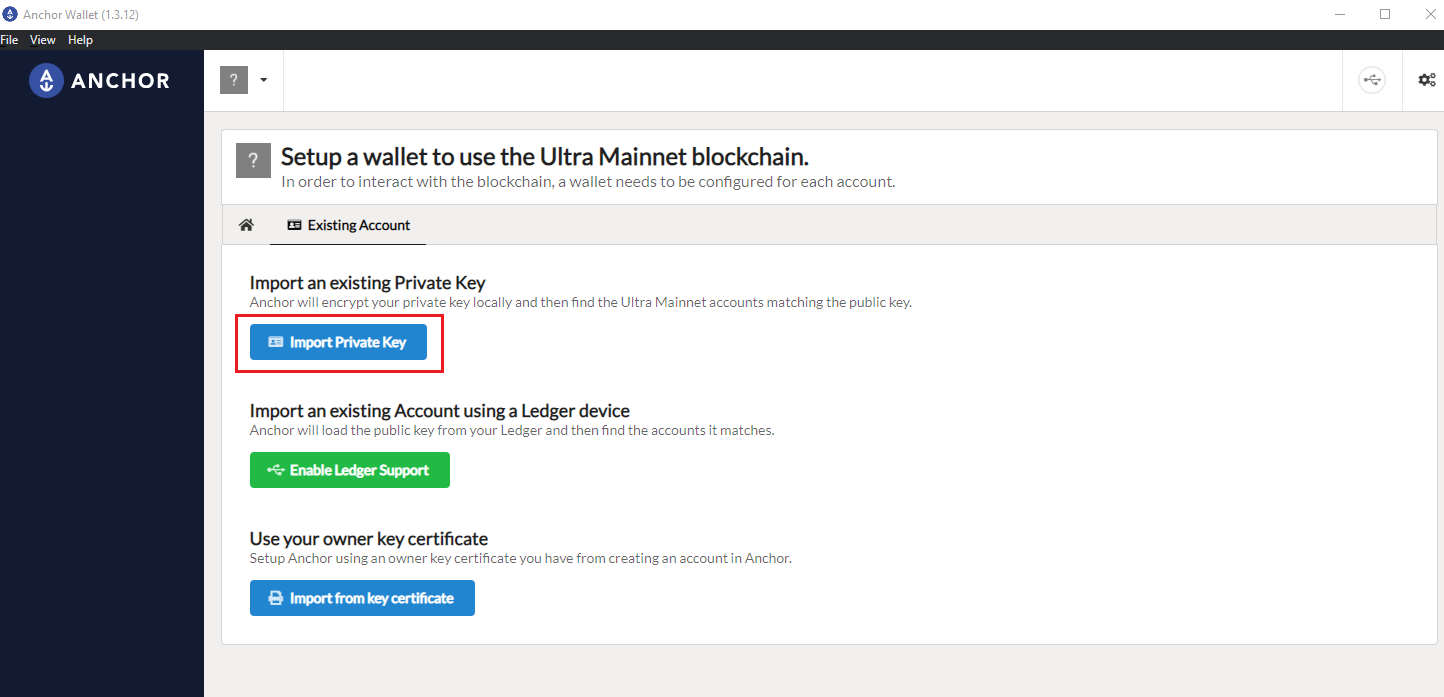
Setup a Walletpage. Click on theImport an existing Accountbutton, and then click onImport Private Key.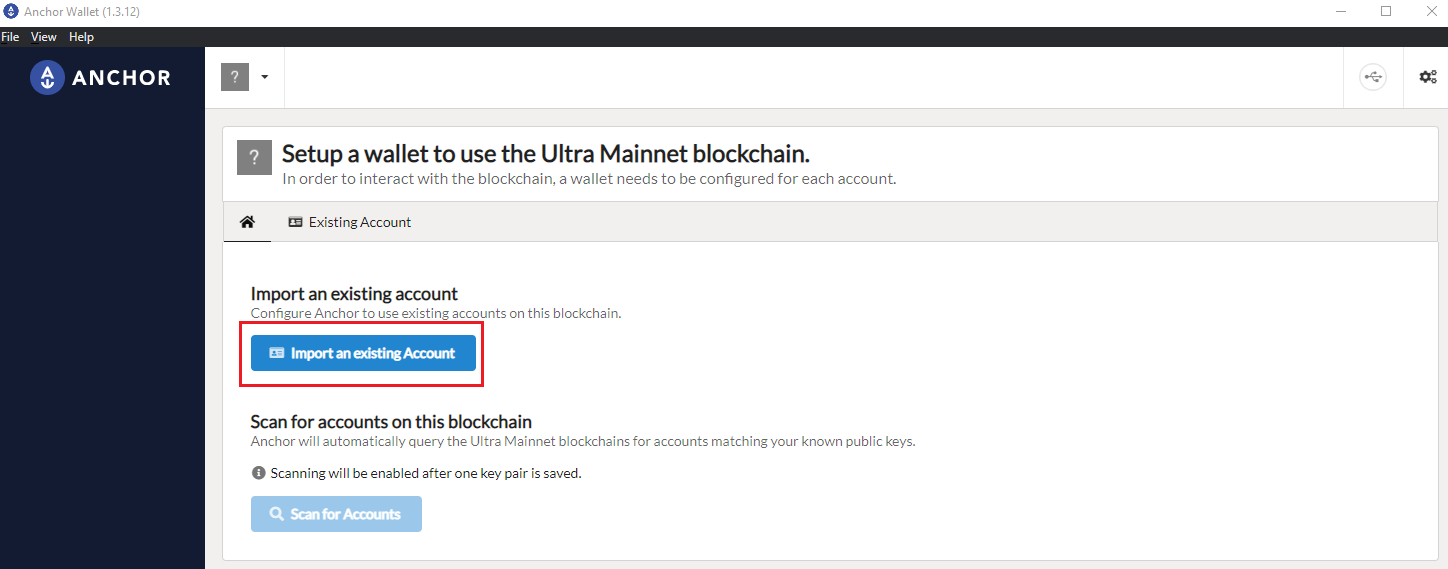
Enter the private key associated with your Ultra Pro account, and it will load a list of all associated accounts for that private key. From the list of accounts, select the one that you want to use. This is usually the account with
@activein its name.Once selected, click on the
Import Account(s)button.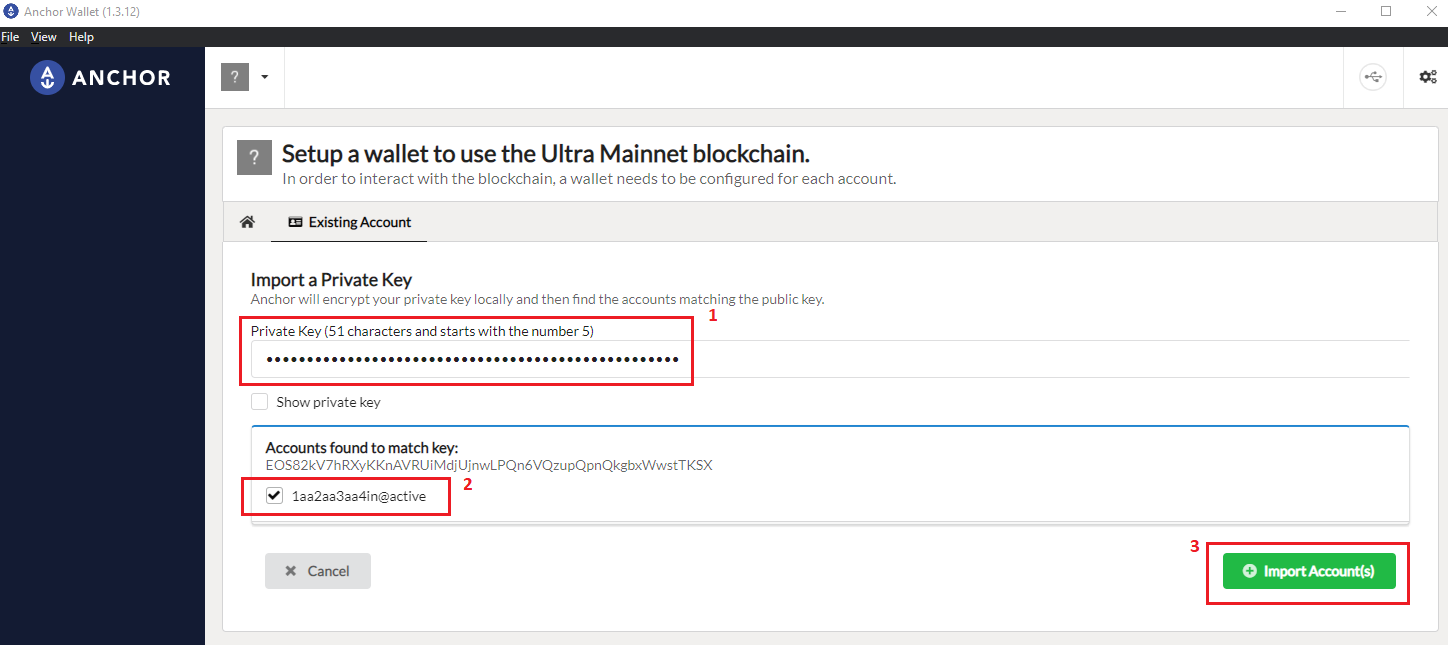
After importing your account, you will see the account home page. On this page you can see your account balance and your account name.

You have now successfully added your Ultra Pro account to Anchor wallet.
Accessing the Tool Kit
To access the Ultra Tool Kit, please visit: https://toolkit.ultra.io
Network Selection
Once you're on the Tool Kit homepage, click on the network selection component on the top right of your screen.

Clicking on the network selection component will open up a list of available networks that you can use the tool kit on. For the sake of this tutorial, we will be using the Ultra Mainnet. From the list of available networks, click on Mainnet.
Login to Tool Kit
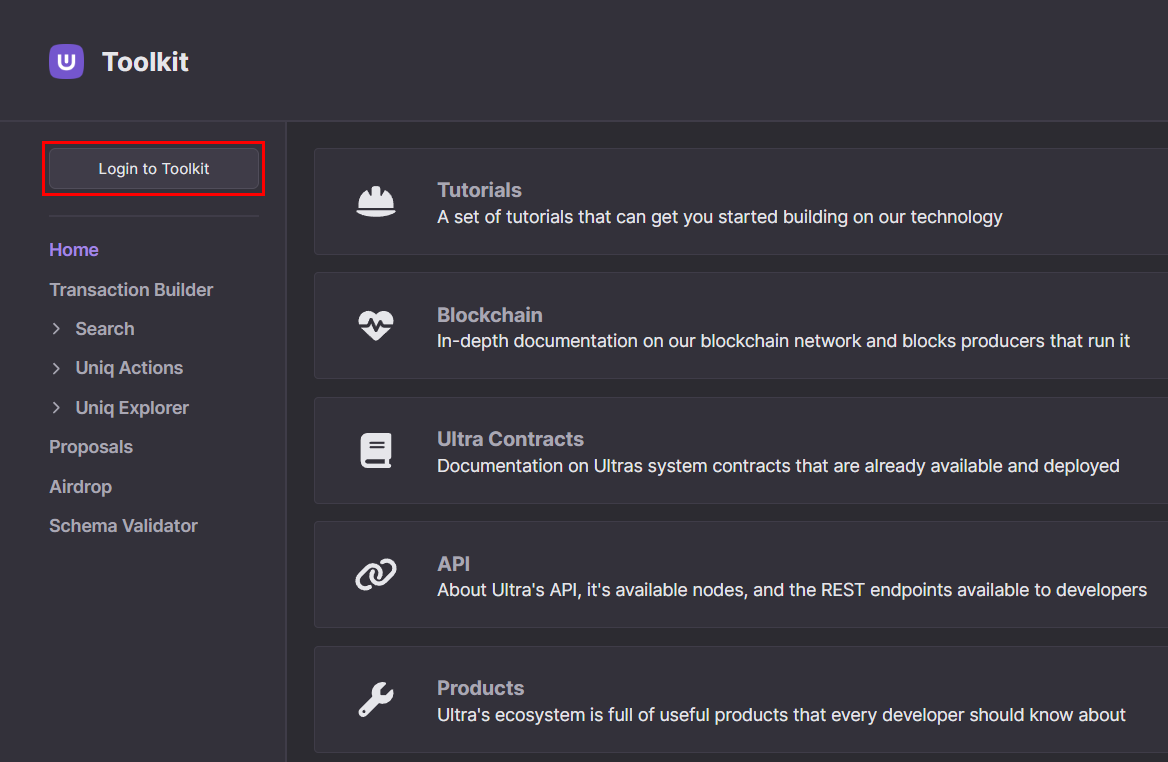
Click on the Login To Tool Kit button to open a list of all supported login methods, and then select the Anchor option.
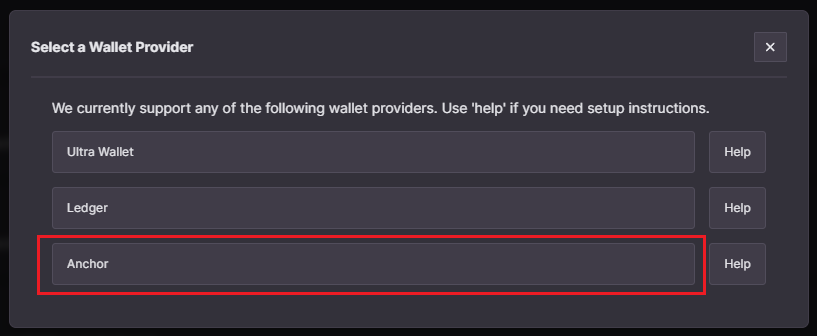
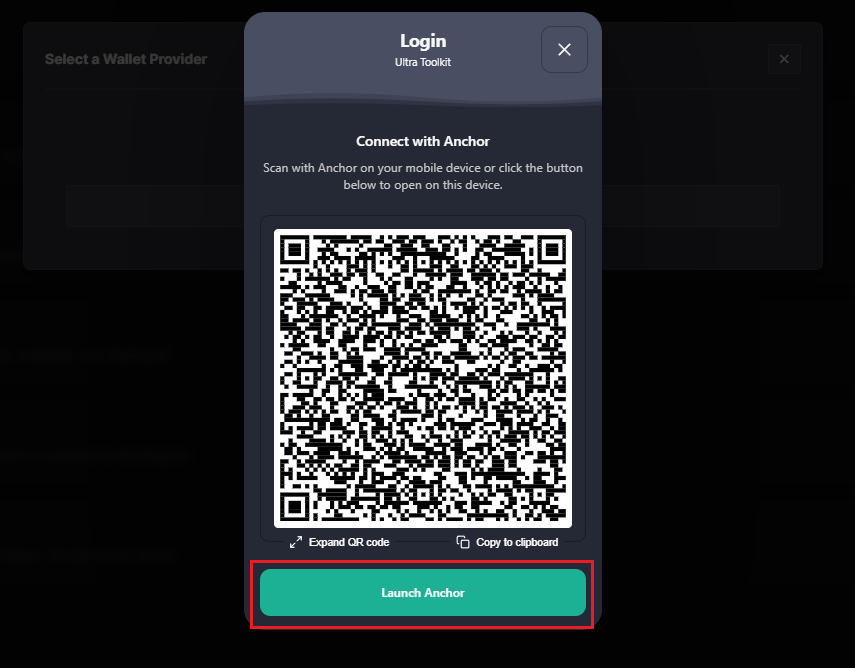
Once you click on Anchor option, a login modal will be opened. This may automatically launch your Anchor wallet. If not, you can click on the Launch Anchor button to open Anchor wallet on your machine.
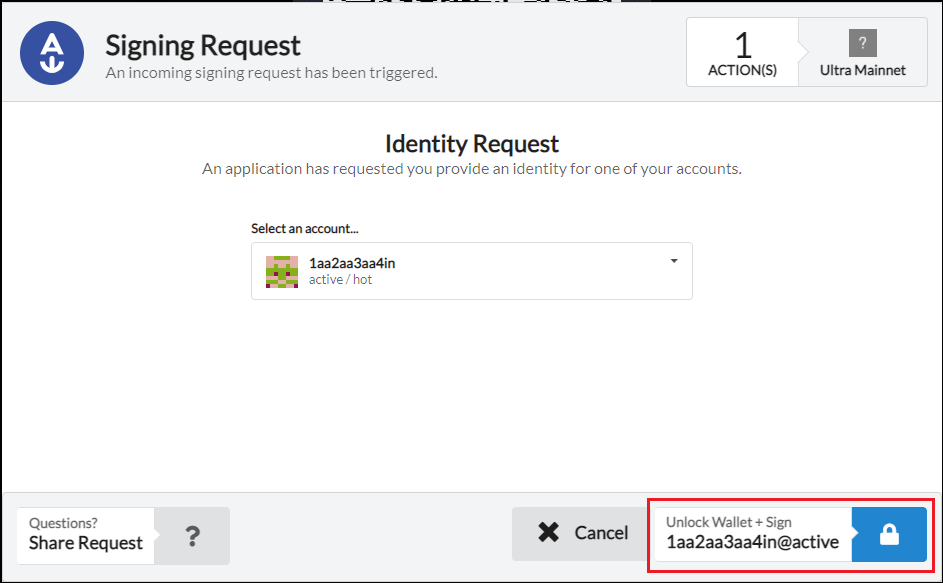
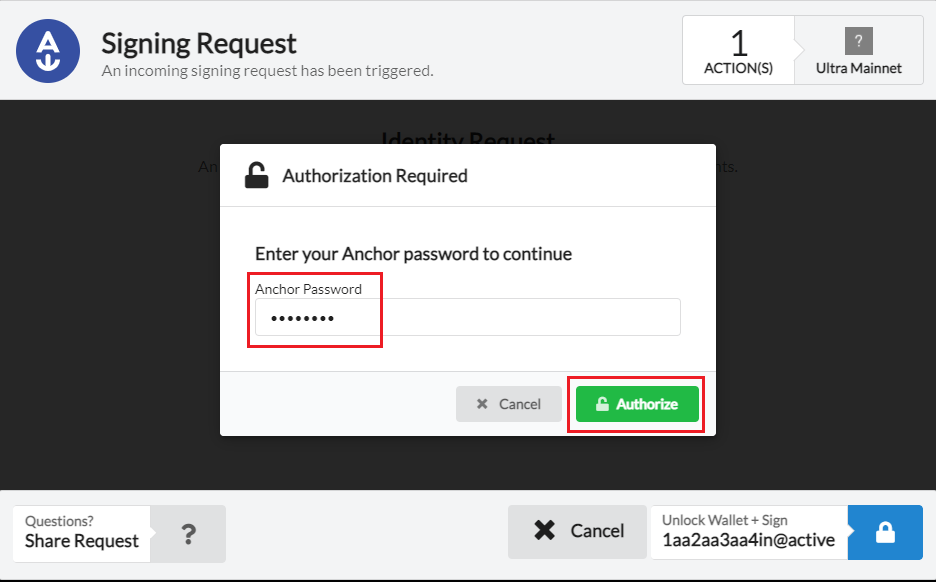
From your Anchor wallet window, you will see a prompt for signing request. Click on the Unlock Wallet + Sign button to continue.
Enter your Anchor password and click on Authorize button.
Once authorized, you will be logged in to the tool kit. You can verify this by checking for your account name in the top left corner of your screen.
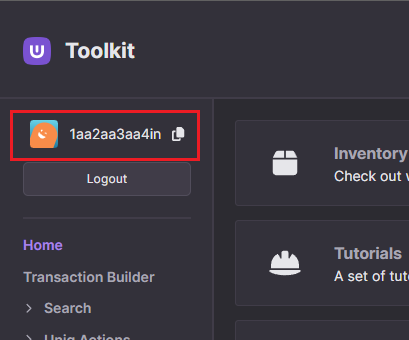
You have now successfully logged in to the Ultra Tool Kit using Anchor Wallet.
What's next?
After logging in to the tool kit, you can utilize it to sign transactions with your Anchor Wallet. Explore the following tutorials which demonstrate the process with Ultra Wallet. However, you can seamlessly adapt these instructions to sign transactions with your Anchor Wallet.