Wallet Connection
In our previous step we ensured that the wallet is connecting to our browser instance. Now let's connect to the extension.
Begin Connection
What we are going to do now is add in some boilerplate code to get the wallet application to work with Ultra.
This code performs the following functions:
- They click login and the ultra wallet prompts them to login.
- After connecting, their
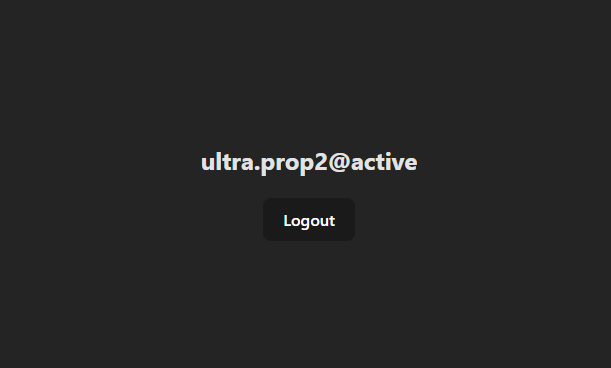
blockchainidis stored. - Their
usernameis then updated in the main window and shown to the user. - They may now click
logoutat any time to disconnect the wallet.
html
<script setup>
import { ref } from 'vue';
// Stores the username instance
let username = ref(undefined);
// Toggles to true when the login failed
let failedLogin = ref(false);
// Handles when the user clicks login
async function beginLogin() {
try {
const response = await ultra.connect();
username.value = response.data.blockchainid;
} catch (err) {
console.error(err);
failedLogin.value = true;
}
}
// Handles when the user clicks logout
async function logout() {
try {
await ultra.disconnect();
username.value = undefined;
failedLogin.value = false;
} catch (err) {}
}
</script>
<template>
<div>
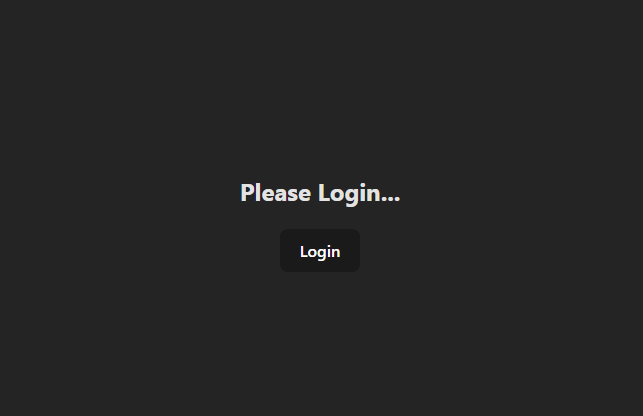
<h2 v-if="!failedLogin">{{ username ? username : 'Please Login...' }}</h2>
<h2 v-else>Failed to Login...</h2>
<br />
<button v-if="!username" @click="beginLogin">Login</button>
<button v-else @click="logout">Logout</button>
</div>
</template>
<style scoped></style>Final Product
Below are some basic images of what you should expect as a final product from this tutorial. If you wish to expand further and perform transactions, check out the Ultra Wallet Product Documentation.